Roasting Hatch green chile peppers is a culinary tradition that brings the vibrant flavors of the Southwest to life. An induction cooktop offers a unique advantage, providing even heat distribution and precise temperature control. In this blog post, we will explore the benefits of roasting Hatch chili peppers on an induction cooktop and share a step-by-step guide for achieving perfectly charred Hatch chiles. Additionally, we will provide tips on storing grilled chiles to preserve their freshness and extend their enjoyment.
Jump to RecipeInduction Cooktop Grilling: A Superior Option
Although you can easily use a traditional cooktop, induction cooktops have revolutionized the culinary world, offering several advantages for grilling Hatch chiles:
- Precise Temperature Control: Induction cooktops respond instantly to temperature adjustments, allowing you to achieve the perfect char without burning the chiles.
- Even Heat Distribution: Induction’s unique heating method ensures that the entire surface of the griddle is evenly heated, preventing hot spots and promoting consistent cooking.
- Enhanced Safety: Induction cooktops only heat the cookware, making the surface cool to the touch and reducing the risk of burns.
- Energy Efficiency: Induction cooktops transfer heat directly to the cookware, minimizing energy loss and making them environmentally friendly.
Roasting Hatch Green Chile Peppers on an Induction Cooktop: A Step-by-Step Guide (watch the video here)

- Preparing the Chiles: Rinse the Hatch chiles thoroughly and pat them dry with paper towels.
- Preheating the Cast Iron Griddle: Place a cast iron griddle on the induction cooktop and set the heat to medium-high. (check out my post to learn how to cook with cast iron on an induction cooktop).
- Seasoning the Chiles: Brush the chiles lightly with olive oil to prevent sticking and enhance their flavor.
- Grilling the Chiles: Place the chiles on the hot griddle and cook for 2-3 minutes per side or until they are blistered and charred.
- Charring and Blistering: The key to perfect grilled Hatch chiles is achieving a beautiful char and blistering on the skin. This process infuses the smoky flavor that defines their unique taste.
- Remove and Rest: Once the chiles are evenly charred and blistered, carefully remove them from the grill using tongs. Allow the chiles to cool slightly before handling. Place them in a bowl and cover with a kitchen towel or in a plastic storage bag. Allowing them to steam slightly will make peeling easier.
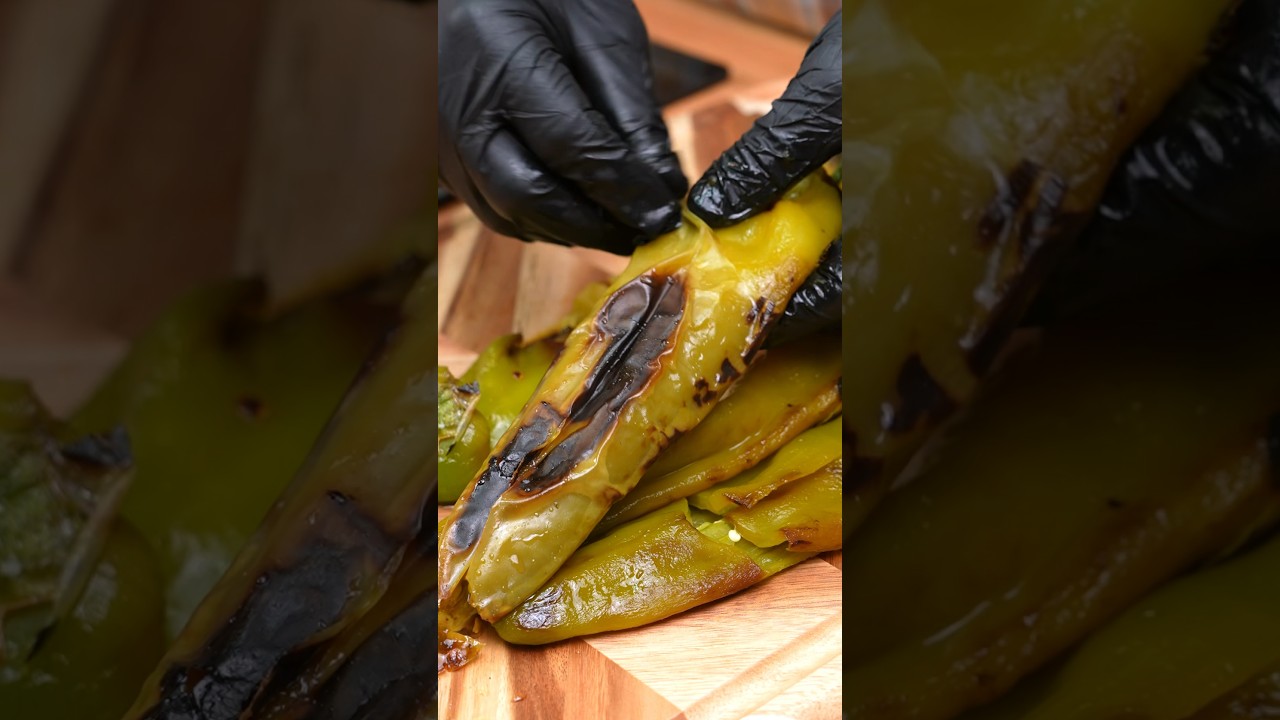
- Peel and Enjoy: After a few minutes of rest, gently use your gloved fingers or a paper towel to peel the charred skin off the chiles. It should come off easily, revealing the deliciously smoky flesh underneath.
- Serving: Once peeled, you can use them in your favorite recipes or enjoy them as a standalone dish.

Storing Roasted Hatch Green Chiles
Grilled Hatch chiles can be stored in an airtight container in the refrigerator for up to 5 days. Alternatively, you can freeze them for longer-term storage:
- To freeze grilled chiles: Allow them to cool completely, then remove the skin, seeds, and stems. Chop the chiles and store them in airtight containers in the freezer for up to 3 months.

Tips for Grilling Hatch Green Chile Peppers on Induction Cooktop (check out my post to learn how to cook with cast iron on an induction cooktop).
- Use a well-seasoned cast iron griddle or pan for optimal heat retention and charring.
- Adjust the heat as needed to prevent the chiles from burning.
- Grill the chiles in batches to ensure even cooking.
- If the chiles start to smoke excessively, reduce the heat slightly.
- Wear gloves to protect your hands from the oils in the chiles.
- Use grilled Hatch chiles to add a smoky, flavorful twist to tacos, burritos, salsas, stews, and more.
Can I Roast Other Peppers on an Induction Cooktop?
Roasting chili peppers on an induction cooktop isn’t limited to just Hatch chiles; you can explore a world of flavors by grilling various chili pepper varieties right in your kitchen. An induction cooktop’s even and precise heat control makes it an excellent choice for this culinary adventure.
Consider grilling poblano peppers to create the smoky base for a classic Mexican dish, chiles en nogada. Or, try grilling jalapeños for a spicy kick to your homemade salsa. The mild and slightly sweet flavor of Anaheim peppers becomes more complex when charred on the grill, making them a fantastic addition to sandwiches and salads.
For those who appreciate a fiery punch, grilling serrano or even habanero peppers on your induction cooktop can bring out their intense heat and smokiness. These grilled peppers can be used to add a spicy flair to soups, stews, or marinades.
The process is similar to roasting Hatch chiles. Just rinse and pat the peppers dry, brush them with oil, and grill them until the skin is charred and blistered. After grilling, you can peel and use them immediately or store them for future culinary creations.
So, whether you’re a fan of mild or hot, sweet or smoky, your induction cooktop opens up a world of possibilities for grilling chili peppers and infusing your dishes with that irresistible grilled flavor. Get ready to experiment with various peppers and discover new taste dimensions in your favorite recipes.
Chef Anthony’s Thoughts
Grilling Hatch green chile peppers on an induction cooktop is a convenient and rewarding culinary experience. By following the steps outlined in this blog post and utilizing the advantages of induction technology, you can easily create delicious and authentic dishes showcasing the vibrant flavors of Hatch chiles. Whether you are a seasoned chef or a home cook, the art of grilling Hatch chiles is an invitation to explore the rich culinary heritage of the Southwest. So gather your ingredients, power up your induction cooktop, and embark on a journey of smoky, flavorful creations!


Roasting Hatch Green Chile Peppers on Induction Cooktop: A Flavorful and Convenient Method
Equipment
- Induction Cooktop
- Cast iron grill pan
- Tongs
- Airtight containers or resealable plastic bags
Ingredients
- Fresh Hatch green chiles
- Avocado oil
- Salt
Instructions
- Start by thoroughly rinsing the Hatch chiles under cold water. Pat them dry with a clean towel, ensuring they are moisture-free.
- Place your cast iron grill pan on the induction cooktop. Set the induction cooktop to medium-high heat. Allow the grill pan to heat up evenly.
- Lightly brush or spray the Hatch chiles with avocado oil. This step prevents sticking and enhances the smoky flavor during grilling.
- Carefully place the oiled Hatch chiles on the heated cast iron grill pan. Use tongs to rotate them occasionally. You want to blister and char the skin, giving the chiles their characteristic smoky taste. This usually takes about 5-7 minutes per side, but keep an eye on them to avoid overcooking.
- Once beautifully charred on both sides, use the tongs to transfer the grilled Hatch chiles to a clean plate. Allow them to cool for a few minutes before moving on to the next step.
- You can take it a step further for added convenience. Roast the chiles as mentioned above, then peel off the charred skin. After peeling, you can puree the chiles or keep them whole, packing them into airtight containers or freezer bags. This method gives you the convenience of pre-roasted Hatch chiles, ready for use in various recipes.
- If you plan to use the grilled Hatch chiles within a few days, place them in an airtight container or resealable plastic bag. Store them in the refrigerator to keep them fresh and ready for your next culinary adventure.
- To enjoy the smoky goodness of Hatch chiles beyond the next few days, freezing is a fantastic option. First, let the grilled chiles cool completely. Then, remove the charred skin, seeds, and stems. Chop the chiles as needed and store them in airtight, freezer-safe bags or containers. This way, you can savor the taste of Hatch chiles year-round.
Video